Addressable RGB (ARGB) has become a standard feature in modern PC components—fans, AIO coolers, light strips, and even GPU/CPU blocks. While most users know “5V 3-pin ARGB,” fewer people understand that there are actually two generations of ARGB wiring systems: Gen 1 and Gen 2.
This guide explains the differences, compatibility rules, and how you should properly connect each generation.
What Are ARGB Gen 1 and Gen 2?
Both Gen 1 and Gen 2 ARGB share the same electrical standard:
Voltage: 5V
Pin count: 3-pin
Control: Individually addressable LEDs
Header shape: Typically 3-pin with a missing pin in the middle (5V-D-G)
The key difference lies in the signal design and controller communication.
ARGB Gen 1 (Traditional 5V 3-Pin ARGB)
This is the classic ARGB standard used by nearly all brands for many years:
Pin layout: 5V / DATA / GND
Signal type: Basic digital LED control
LED type: Standard WS2812/WS2811-type addressable ICs
Daisy-chain: Supported
Motherboard compatibility: ASUS Aura Sync, MSI Mystic Light, Gigabyte RGB Fusion, ASRock Polychrome, etc.
Gen 1 Key Characteristics
Works with almost all older ARGB fans/lights
Same data line runs through all devices
Device identity is fixed—motherboards cannot identify “individual devices,” only LED positions
Maximum LED count may vary depending on motherboard
Gen 1 is simple: plug everything together, and the signal flows straight through.
ARGB Gen 2 (ASUS Gen 2)
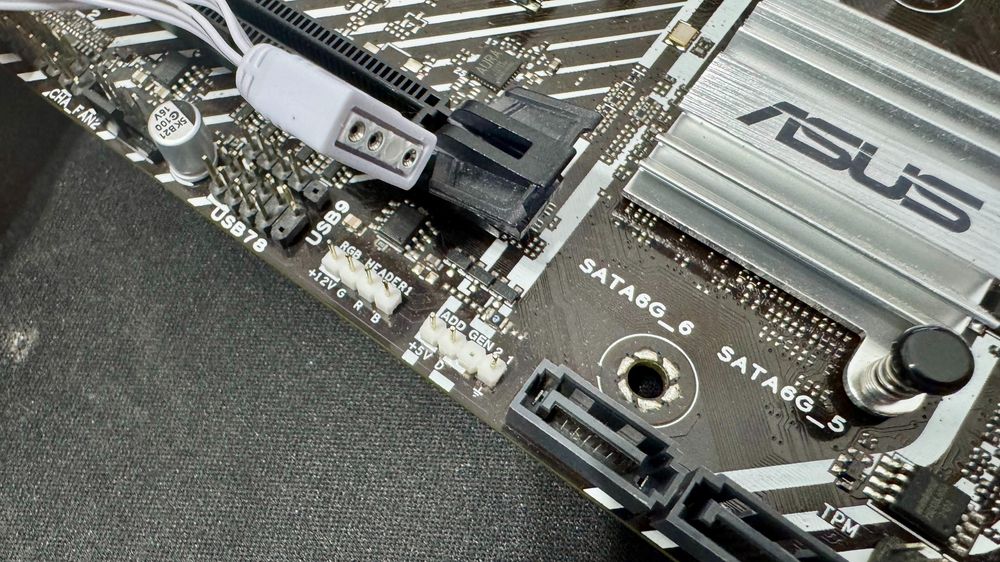
Introduced mainly by ASUS, this version still uses 5V 3-pin, but with additional ID/telemetry capability built into the LED module or controller.
Gen 2 Features
Allows the controller to detect the number of LEDs
Enables automatic calibration
Allows more precise effects because the system knows the LED count
Same connector shape as Gen 1
May include extra detect resistor that the motherboard reads
Even though the connector looks identical, Gen 2 devices have a slightly different internal wiring/resistor setup for LED count detection.
Are ARGB Gen 1 and Gen 2 Compatible?
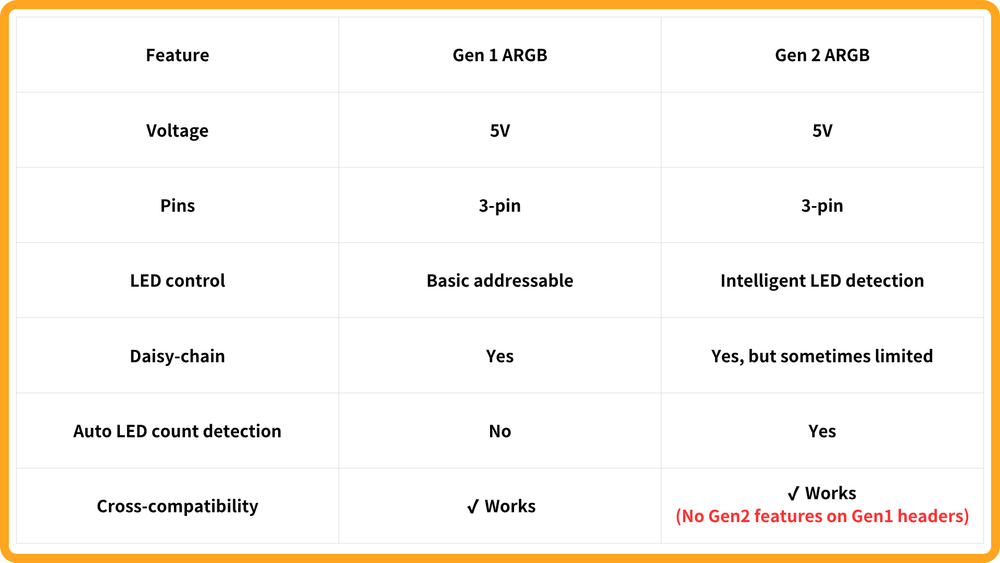
Electrically compatible
Both use:
5V
3-pin
Same digital LED protocol
You can connect Gen 1 to Gen 2 headers and vice versa.
However:
Gen 1 devices do NOT support Gen 2’s intelligent LED detection
Gen 2 devices connected to Gen 1 headers will lose Gen 2 features, but still light up normally
Daisy-chain rules change slightly
Daisy-Chain Compatibility
Gen 1 → Gen 1
Fully daisy-chainable. No issues.
Gen 2 → Gen 2
Fully compatible. LED detection works.
Gen 2 device → Gen 1 header
Works, but LED count auto-detection is disabled.
Gen 1 device → Gen 2 header
Works, but the motherboard cannot read LED count (normal for Gen 1).
⚠ Important Note
Some ARGB Gen 2 devices include extra protection or ID resistors.
If you daisy-chain a Gen 1 product behind a Gen 2 product, LED detection may misreport or fail.
Lighting still works, but auto-calibration may not function correctly.Best practice:
Put Gen 2 product first (closest to the header), then chain Gen 1 behind it
—OR—Use separate headers if you want perfect Gen 2 detection.
When Do You Need a Hub?
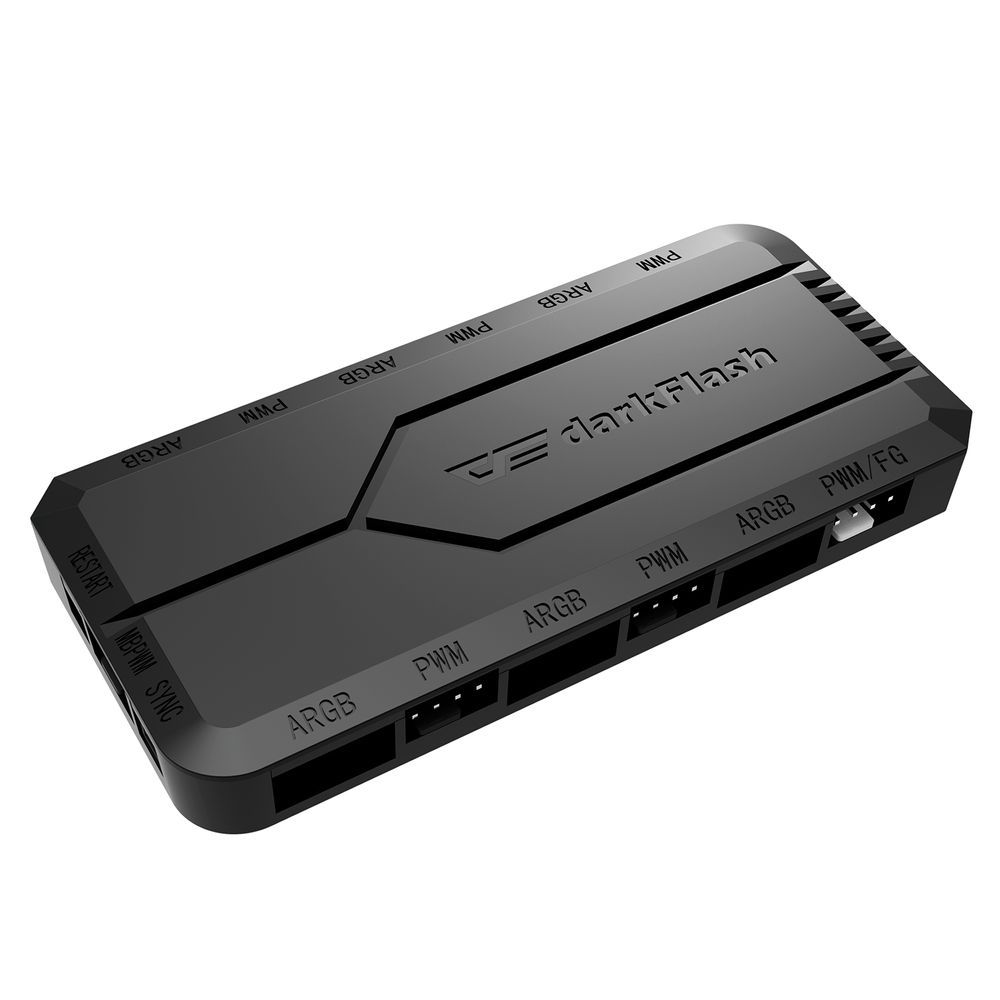
Use an ARGB hub when:
You have multiple fans
Your motherboard has limited ARGB headers
You want synchronized lighting
You want cleaner cable management
Note:
Gen 2 auto LED detection usually does not work across:
Cheap Gen 1 hubs
Non-Asus hubs
If you want full Gen 2 functionality, you need an ASUS Gen 2-compatible hub.
Conclusion
ARGB Gen 1 and Gen 2 may share the same 5V 3-pin connector, but they differ in how they handle LED control and device detection. Gen 1 offers universal compatibility and simple daisy-chain lighting, while Gen 2 introduces more intelligent features such as automatic LED count calibration—especially useful on ASUS motherboards. The good news is that both generations are electrically compatible, meaning you can mix and match them as long as you understand how detection and chaining behave.
For most builds, connecting Gen 1 and Gen 2 together will work perfectly fine. Just remember that Gen 2 features won’t function when paired with a Gen 1 header or hub, and placing a Gen 2 device first in the chain ensures the best results. With proper planning and cable management, both systems can deliver vibrant, synchronized RGB lighting throughout your PC build.